

Hello, hello blogging world,
I did not forget you! You could say I just forgot writing fresh blog posts lately?? (insert palm-face here)
Oh well, I am sure it wasn’t missed much, but hey, I love sharing things like I used to do here, but lately I have been doing it regularly with all the amazing folks who are on my email list. (if you are not, you have been prompted with that pop-up when you landed here, so if you like to be – welcome!!) On my list of things to share over in the newsletter is one of my favorite tips about one of the very basics of quilting – accurate 1/4″ seam allowance, and I remembered that I did write a detailed tutorial here on the blog, long, LONG time ago… (like more than 10 tears ago?? eek!!) So one search and one fresh edit later – here it is again, refreshed and ready for anyone who may need it!!
If you have been quilting for a while, you probably have your favorite way to do it – 1/4″ foot? a line on your sewing machine to follow? Some other gadget? And yes, I know that nowadays, we can get that special 1/4″foot with a guide, and I do have and use that one too, but just in case you don’t have it or can’t get it for your machine, read on!
What I realized after so many years of quilting is that even though we get set in our ways, it is always good to stay curious and learn something new. So I am here to show you one more way to achieve that accurate quarter inch allowance – let’s see if you like it!!
I started with a very basic sewing machine and did not have a special 1/4″ foot. I did buy a generic one, used it but found it not as easy always and a bit tiring – constantly watching that fabric and edge of the foot and making sure they are aligned can be tiring if you are sewing for a long time. My AHA moment came when I took one of my first classes with a national teacher, in Vermont Quilt Festival. It was Sharyn Craig and class was called Northwinds (great block, must show you sometimes!)
But the main lesson for me, a fair beginner at the time, was her way of achieving a good, consistent 1/4″ seam allowance – and in an easy way! This is what she used:

Yes – you saw it right, MOLESKIN! The one “normal” people (he he) use for their feet! 🙂 Actually it is Dr. Scholl’s MoleFOAM – Padding that we were using (very important distinction from Mole SKIN, which is much thinner!). Here is how MoleFOAM-Padding looks like:

That extra thickness is what really helps – read on to see why! Package comes with two sheets like this one shown, and you use only a small portion at the time, so one package will last you a long time. To use it, I take my rotary cutter and ruler and cut strips that are approximately 3/8″ wide, like this:

Using rotary cutter to cut it gives a good, clean straight edge and that is important.
Once you have your strip – it is time to “install” it to the sewing machine – it has a sticky back, so it adheres nicely but it does not leave any residue or damage on the machine, so don’t worry about that.
The goal here is to put this “guide” exactly 1/4″ from your needle, or if aiming for a SCANT 1/4″, you can do that too! Here is how:
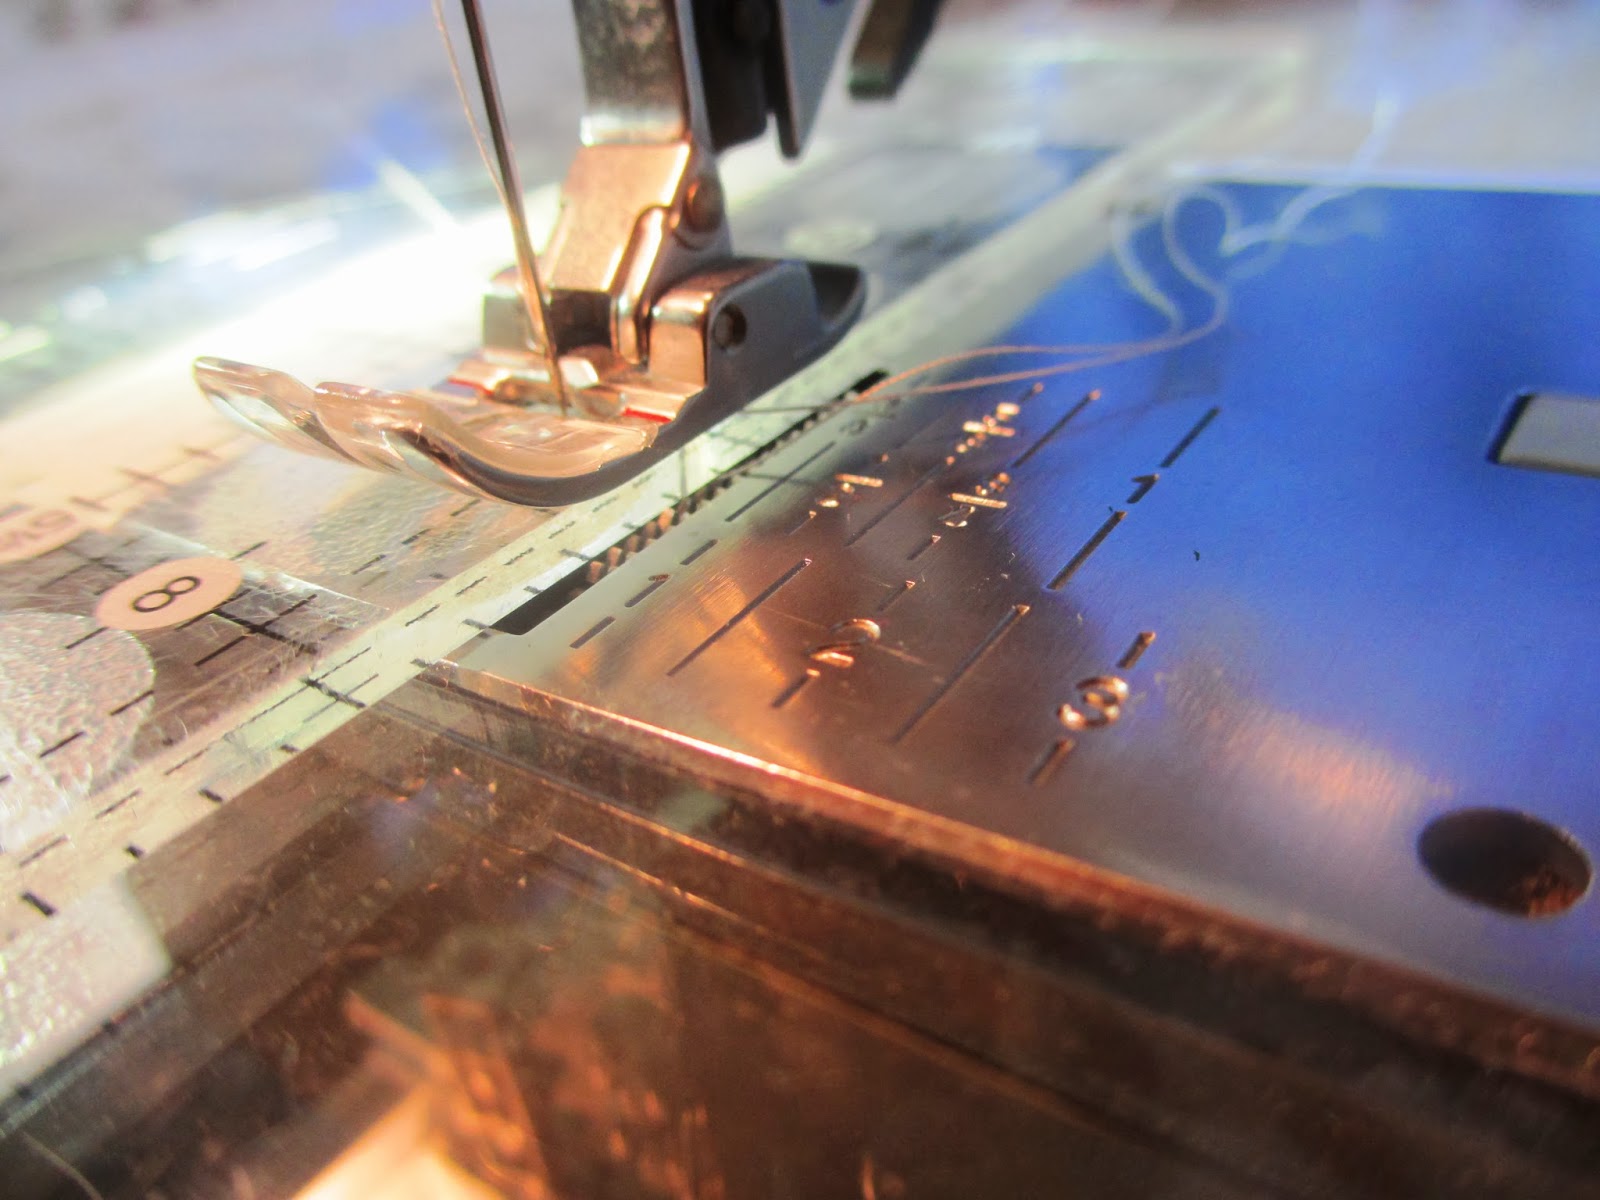
1. Take one of your quilting rulers and find a FIRST 1/4″ line from the RIGHT edge of the ruler: (pointed to in the photo)

2. Slide the ruler under the presser-foot and lower the needle right on that 1/4″ line:

Here is the closer look of the needle lowered on the line – actually, if you look closely, needle is NEXT to the line, on its RIGHT side – that is how I position it if I want SCANT 1/4″ seam allowance (which is what many patterns and sewing instructions call for)

If you want an EXACT 1/4″ seam allowance, then position the needle EXACTLY ON the line, like this:

3. Once you have the needle in the right place, lower the presser-foot down on the ruler, so that is holds it in place:

4. Take one of the cut strips of Molefoam and peel-off the paper on the back to expose the sticky back:

5. Hold the ruler with your left hand, just so it doesn’t move, and place the Molefoam strip SNUG against the ruler. Be careful not to place it UNDER the presser-foot (it will obstruct its work) but just as close to is as you can:

Here is how it looks on the side:

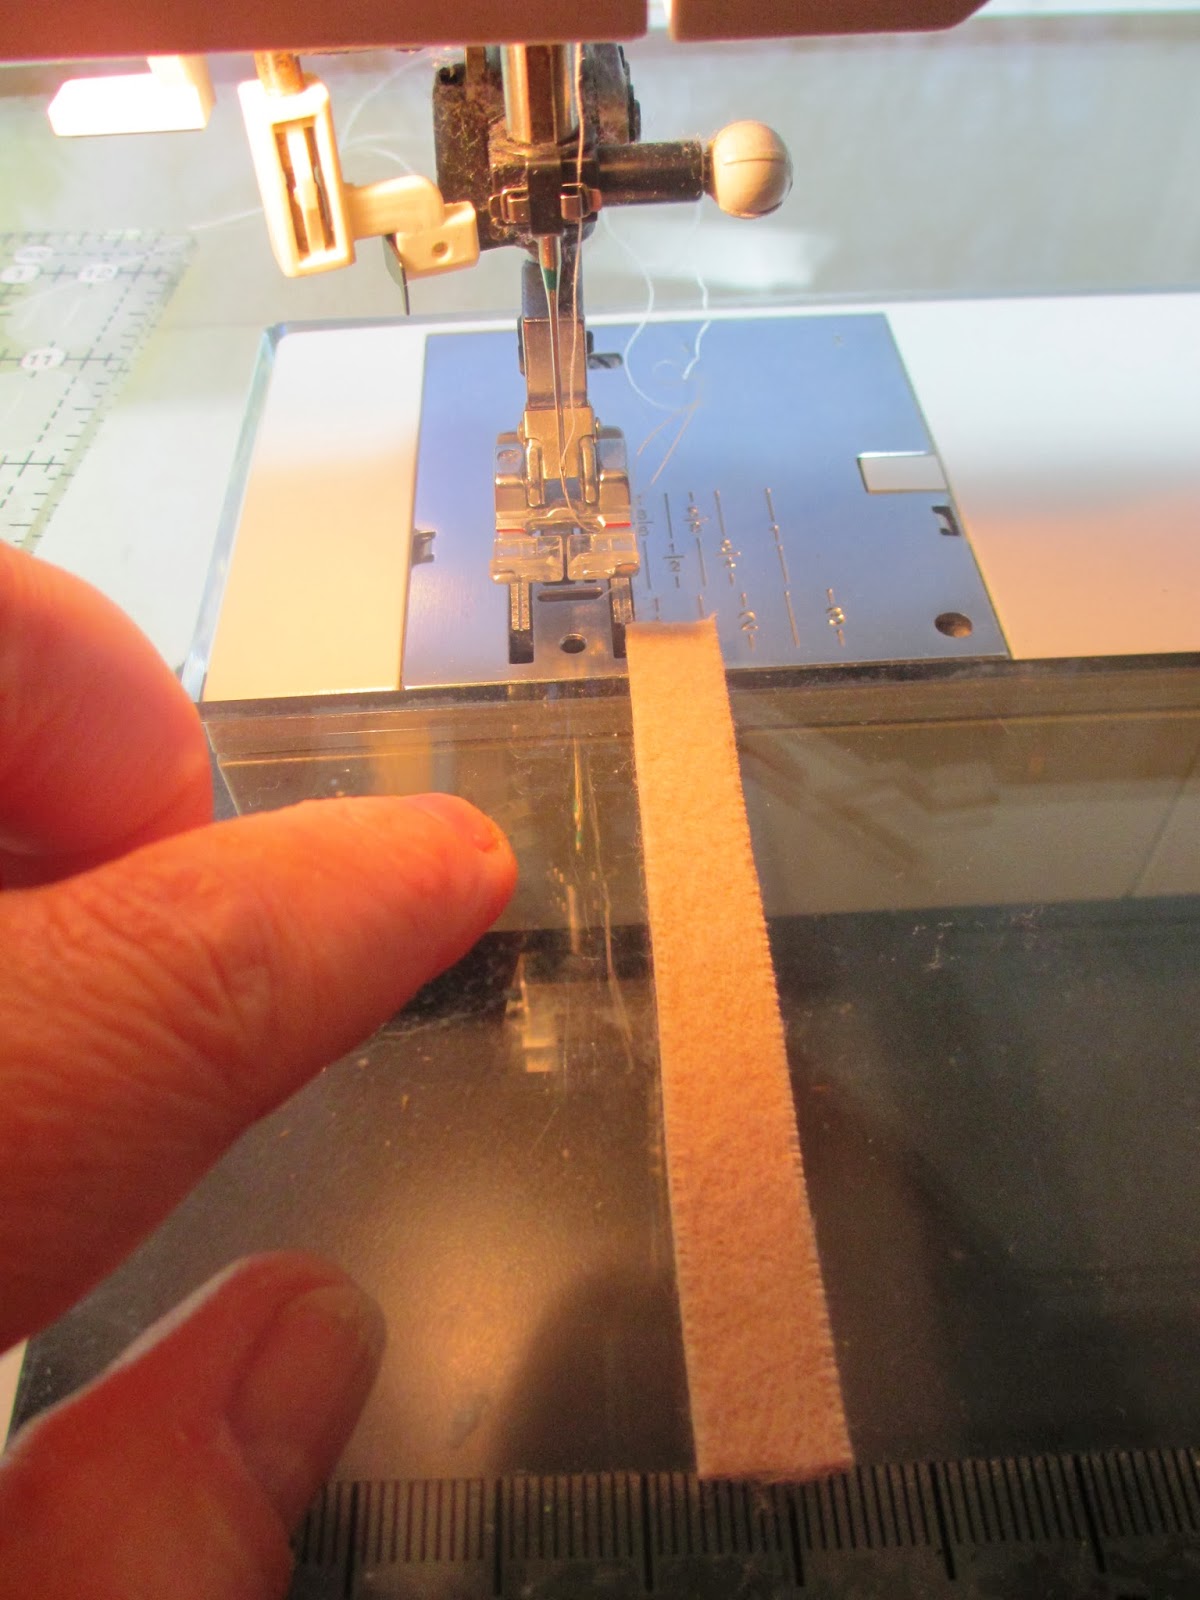
6. Lift the presser-foot and needle, remove the ruler and you are now ready to sew:

7. When sewing, simply slide your fabric pieces right along that guide, making sure you are not pushing fabric over it or pulling it away from it – just slide it right along the guide!

And here is your nice, consistent 1/4″ seam!

So lets check it now! To check your seam, simply align the edge of the ruler with the edge of the sewn fabric and if you set it to be EXACT 1/4″ seam, your stitching should be right UNDER that 1/4″ line of the ruler, like this:

If you wanted a SCANT 1/4″ seam, your stitching should be right NEXT to the 1/4″ line of the ruler, like this:

So, what do you think? Does this make sense to you?
I really like using this kind of 1/4″ guide, specially when doing strip-piecing and joining those 40″ ;long strips. This gives me an easy to use guide, seam is nice and consistent and I don’t have to strain my eyes constantly watching the edge of the 1/4″ foot and fabric (as you have to do when using regular 1/4″ foot or a line on the bed of your machine). Using just tape as many do also didn’t work well for me – if it’s just one layer of tape, it really doesn’t give me the guide I can slide fabric along, it’s not thick enough. If it is many layers of tape, besides being to tedious to make, those layers can separate…just a bit more messy? Molefoam strips are just easier to use!
Also, this system allows me to do the SCANT 1/4′ seam if I want to.
This SCANT 1/4″ stuff is sometimes confusing, specially for beginners. Why does one want to use it anyway? Here is a quick resoning:
When making a block with many seams, the thickness of the thread (and folding fabric over those seams) will “eat-away” some of the block size, so using the scant 1/4″ seam will accommodate for that and ensure your block comes exactly the size it should be. If your block has only few seams (like 4-patch or Rail-fence), this is not a big issue and may not be needed.
So in full fairness, lets also look at the 1/4″ foot with A GUIDE. For my Pfaff, it looks like this:


It does work, and I do use it as well, however there are certain situations when I still prefer my Molefoam guide. Specifically if I am doing a lot of strip-piecing, the guide is just more consistent and easier to use (that long strip really glides along the guide!). Also if precise SCANT 1/4″ is needed for more complex blocks, I find this way of achieving it to give me what I need. Another reason – if you can’t get a 1/4″ foot with a guide for your machine or you simply don’t want to buy yet another foot – good, old Dr. Scholl’s Molefoam works really well! Just ask my Beginner’s Quilting students – they all love it!
Let me know if you try it and how you like it and of course if you have any questions!
Here is to hoping I will get back to some more and regular blogging again, because – I do love it!
Wishing you great summer days of fun and sunshine and of course as much quilting as you want,
Marija


Leave a Reply
Want to join the discussion?Feel free to contribute!