Good morning – it’s weekend! Let’s sew something! 🙂
Today, it will be an easy, strip-pieced table runner

The beauty of this one is that it can be made for any season or occasion, depending on what colors you choose and it really is easy enough to do, even for a beginner!
Fabric choices and yardage: You need 5 different Christmas fabric that go together nicely and a border fabric (border fabric can be also one of the 5 fabrics). here is how I auditioned and choose my fabric:

I like these together but two reds are blending too much?

Just changed position of red and green and it looks better! This is my choice and order!
For the table runner you will need TWO 2 1/2″ wide strips (along the whole width of fabric!) from EACH color, except the one in the middle – you will need only ONE strip from that color. Here are my strips, cut and ready:

Join all 9 strips together, LENGTHWISE, in the correct order, with consistent 1/4″ seam allowance. Press all seams in the same direction.

All seams pressed in the same direction (this is important for later!)

Here is the strip-set all pressed and ready for cutting.
Now is the time to cross-cut this strip set!
Place the strip set on the cutting mat, right side down and first square-up and even one edge:

Place one horizontal line of the ruler on one of the seams to make sure it is straight and cut off salvages to make even, straight edge.

Once you have squared-up the edge, cut 2 1/2″ segments from your strip-set. Cut as many as you have (usually 16 from approximately 40-42″ long strip-set).
To make sure your segments are straight, when cutting them, always pay attention that one horizontal line of the ruler and aligned with one of the seams – as shown bellow:

Here are cut segments, all nice and straight! 🙂

Now to create some magic!
Line up your cut segments to be sewn again, but so that each next one is shifted down by one color – as shown on the photo bellow:

Here is one important thing – because your seams were pressed all in the same direction, take every second segment and turn it around for 180 degrees – this will ensure that when you go to sew these segments together, seam allowances are oriented in opposite directions, giving you nice, nested seams! (as shown bellow)

Now simply join all these segments together, making sure each next one is shifted by one color and seam are nested. When you finish, you will have something like this:

OK – this is not a good shape for a table runner, right? 🙂 Here is how to make it straight:
Place your sewn piece on the cutting board, right side up so that one end of it is ready for cutting. Place the ruler on the first row of squares that is FULL wight – as shown on the picture:

Place the ruler so it goes from corner to corner of the two outside squares (white ones) and cut!
Here is how it should look like:

WAIT! We will not discard this piece! It goes on the OTHER side of the table runner! Slide your runner on the mat to get to the other side and place this cut piece as show on the picture:

The piece you cut off from one side fits perfectly on the other side – just align it as show and stitch together (this will be the same as joining the segments before!).
Once you add that segment to the other side, you will have a straight runner! TA-DAH!!

At this point, runner is 47″ long and approximately 14″ wide. Yes – the edges are all zig-zag, but here is how to solve that: You can either put the runner on the cutting mat and straighten the edge but cutting off the “triangles” as shown bellow:

Place the ruler so that the first 1/4″ line of the ruler is touching the top corner of the printed squares (this will leave you a 1/4″ seam allowance so your squares will not have their points blunted!).

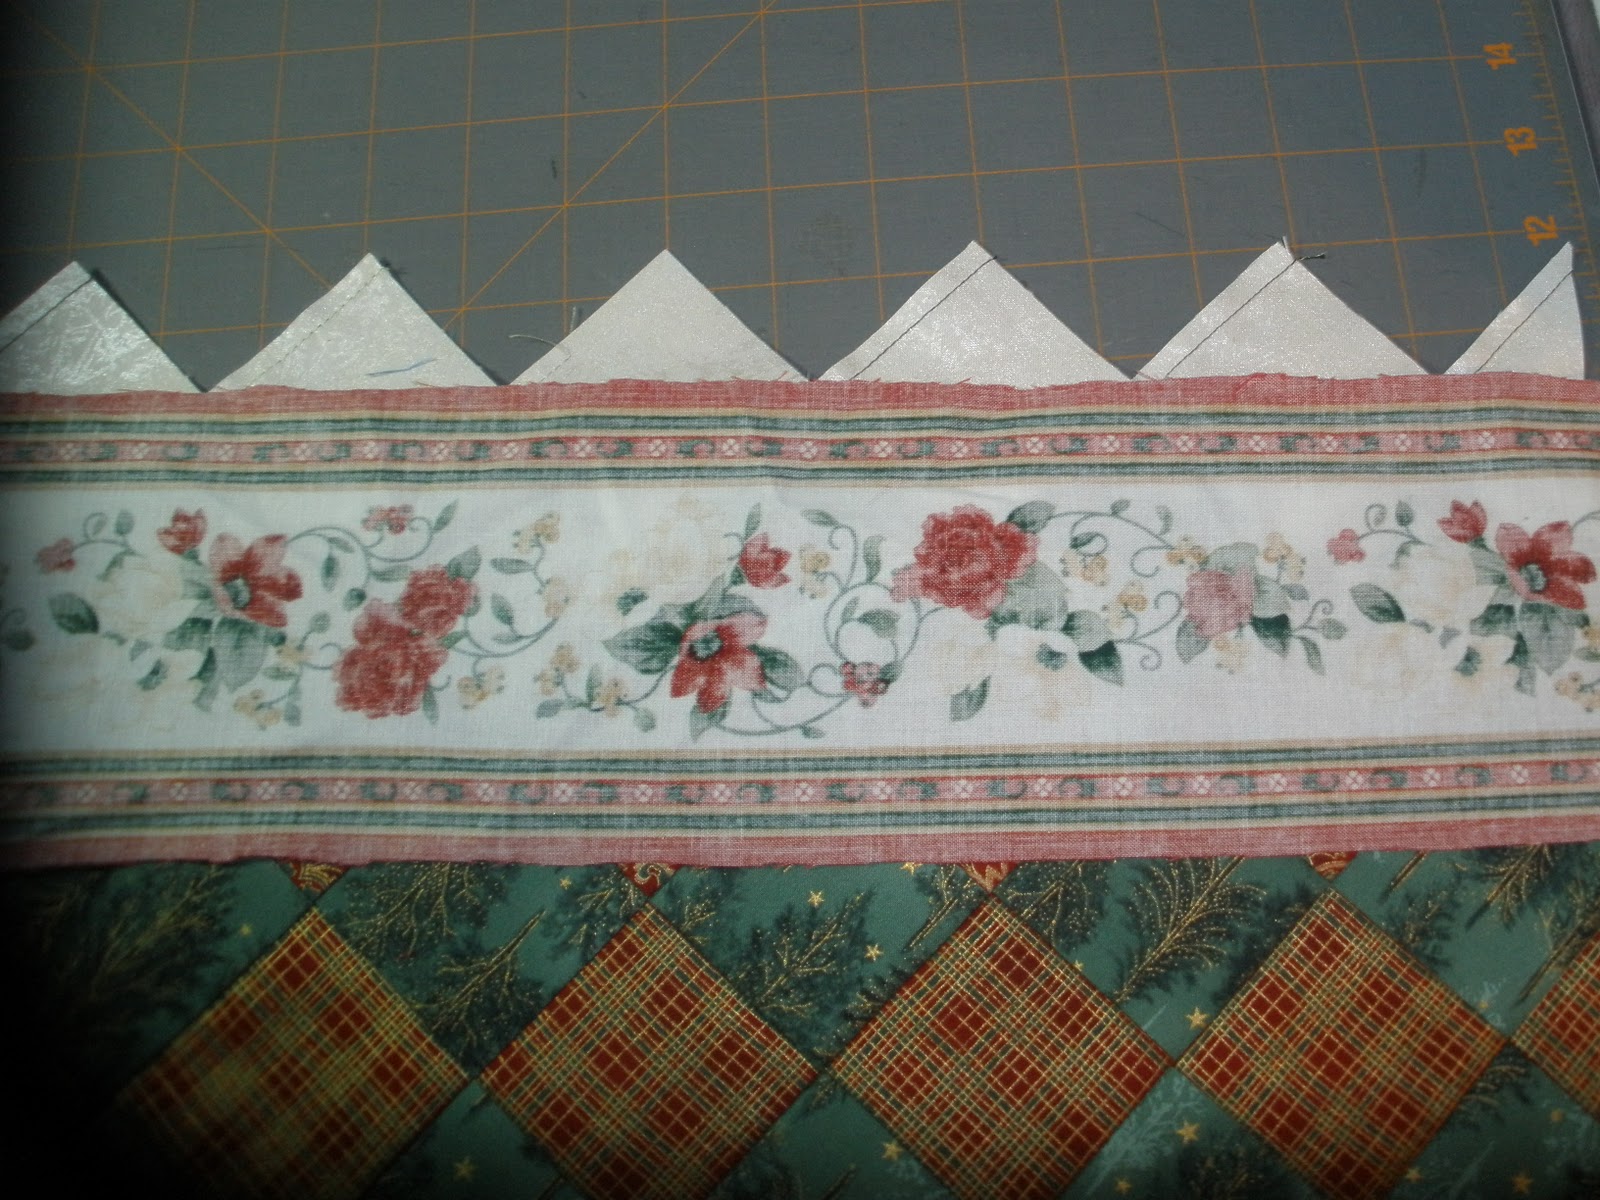
HOWEVER – if you just cut off the triangles, this will leave you with an OPEN BIAS edge to deal with when putting the borders on, and we all know this is not a lot of fun (it stretches!). So, alternatively, you cam place your border strip of fabric as shown on this photo. stitch the border down first (at least it is not an OPEN bias), and THEN cut off the extra triangles.
BORDERS: What kind of borders to put on your table runner is up to you! Here are two choices I was considering – border fabric or just print fabric and an accent narrow border:


I went with the border fabric! Either way, if you are making mitered borders and they are about 4″ wide, you will need two strips that are 56″ long and two strips that are 20″ long. Carefully attach the borders, miter the corners and – VOILA – your table runner is done!!

It took me about two and a half hours to do this. Now on to quilt it – I will post picture of the quilted one as soon as I can – in the meantime, here is another one, in fall colors, all done and quilted:

Hope you will have fun making this one in many different colors, for all different occasions or gifts! Tomorrow we will make some place mats that go with it!
Happy stitching,
Marija
made this runner and its very pretty and although it looks straight, it wont fold straight but is cock-eyed, help please
I love this runner, its so versatile. I made one for a friend in some gorgeous prints from my local quilt store, all French yellow, blue and white. Another in lavenders, deep purples and fuchsias, very striking for a pop of unexpected colour in Spring. Yet another one in children's prints with a Teddy Bear border for a change table for a baby shower gift, and am thinking of one in shades of green, from darkest to lightest, with appliqued ornaments so that it would look like a decorated Christmas tree.
Love this pattern, easy to make but looks difficult, I made it today and will be making more
I was wondering the same thing…I have a similar if not the same pattern and will look at the yardage on that one and let U know, unless you have already gotten the info. Linda
Hi Linda, I think I replied to Joyce back in August, directly by email, but I can't email you because when you comment as Anonymous , I have no email to reply to… 🙂 But that's OK – here it is: yardage is given throughout the blog post – for the main part of the runner it is by the THIRD photo (as you go from the top) – it says you need TWO 2 1/2" wide strips of each color, except for the MIDDLE color where you only need one strip (so that would mean about 6" of yardage – (less than 1/4 yard?) – of each color. For BORDERS – that will depend on what kind of borders you like – it says what you need where borders are described (a bit further down into the post) – If you make them as I did, you will need about 2/3 yard for borders (if your border strips are cut 4 1/2" wide).
I apologize for this not being very obvious – I was a fairly new blogger back then and should have made this more clear! I am going to try and correct that! Hope you will still have fun making this easy table runner and of course – ask more questions if I can help any further. 🙂
I was wondering the same thing…did you ever find the amount of material needed ?
Thanx , Linda
I absolutely love this pattern! Thank you so much for the taking the time to create this tutorial. I am somewhat of a beginner in quilting although I have been sewing for much of my life. I just took an online course in color theory so I decided to use what I learned to whip up a smaller version of this table runner. One thing I did discover is that the lighter colored fabrics do look much nicer toward the outer edged than in the middle. Thank you again!
Did I miss yardage needed for this project?? Can't locate. if posted. Wanted make this week end. Please help!!!!! tks
Great tutorials. I'm only sad I discovered them so close to Christmas because I won't have time to do them all. But I guess there's is no harm in getting ready for next year. 🙂
Thanks melody – glad you like it and will make it! I would love to see a picture hen you are done! Tomorrow are the placemats that will go with this table runner! Have fun!
I"m so glad you posted this on the Pickle Road list. I love this table runner and now that the cats who considered the dining room table their own bed are gone to their own home – I can have a table runner and not have it be a destination for cat hair!!! I'm going to make one of these this weekend. AND another blog to follow.